~~ GO/NOGO Coil Tester ~~
Here is a portable tester that can be used on the road.
Recently, Dan and I toke a trip from our home in New Berlin to Dearborn Michigan to visit The HenryFord and Greenfield Village. On the way we had a number of ignition problems, some of which were our
ignition coils. On the trip we tested each coil merely by holding down the contacts of each coil and listening.
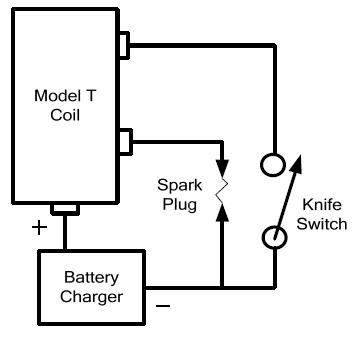
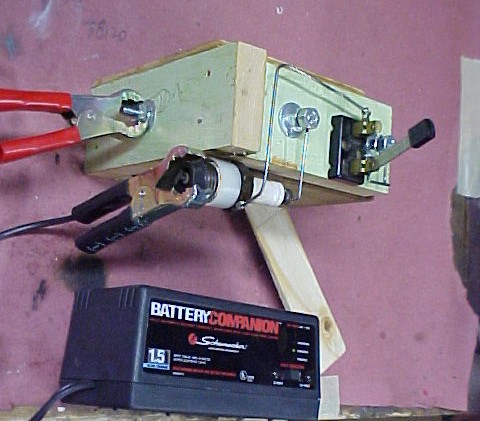 A reduction in engine speed means that coil was OK, if no change occurred then that is the coil that was not contributing to engine power. This method works for a completely failed coil, a slightly better method is to have a external tester. Lugging an HCCT around is a bit much, there are some other testers that are lighter, but are expensive. This tester is a go no-go tester and it allows you to view the quality of the spark. It can be made easily and is very inexpensive. I cut three pieces of 3/4 inch pine so that a coil would easily fit in the U shaped tester. I used three 1/4 - 20 flat head machine screws for contacts. The U shape is re enforced with a small piece of plywood on the back. The U shape was made so that the coil would have a loose fit. A small wooden wedge can be used to make up the contacts. An old spark plug is held in place by a small cable clamp and a drywall screw. A small knife switch was used to act as the timer contact and some rigid wire connects the parts. The battery charger in the picture is a small trickle charger. Even though it is small, it works fine. The tester can also be used on the road by using the
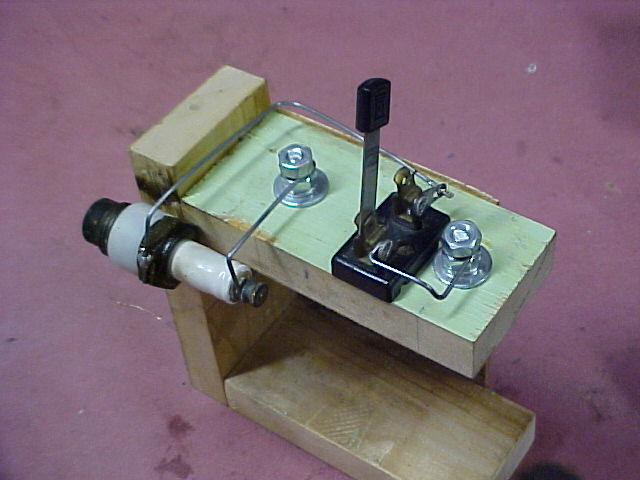
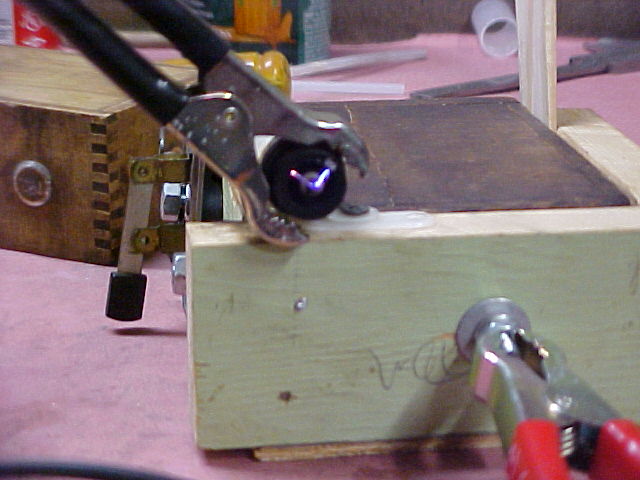
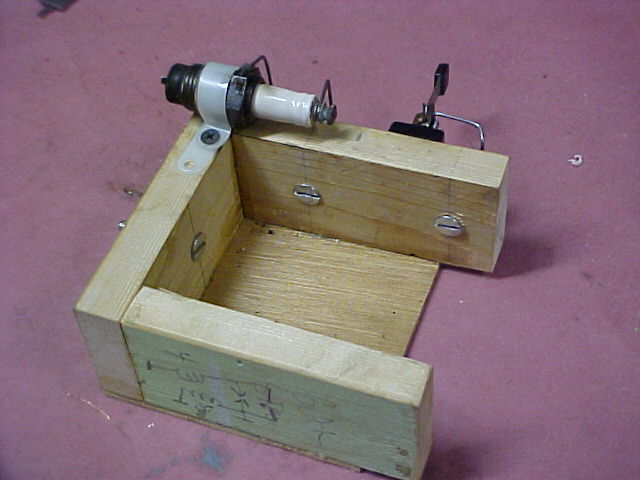 cars battery and a couple of jumpers. The connections are simple, the negative of either battery or the charger clips to the base of the spark plug and the positive to the bottom bolt of the tester. The ground prong of the spark plug was removed to make the spark gap as large as possible. A spark can more easily jump a 0.035 inch spark gap in open air than it can within the compressed gases of the combustion camber. In the picture on the left, you can see, I
 removed the spark plug ground strap. A nice bright strong spark, indicates that this coil is at least functional and would probably work OK in the engine. A simple check is to see if the cushion spring is clean and functioning properly. To properly adjust a coil you will need a HCCT machine, but this setup can work in a pinch or on the road.
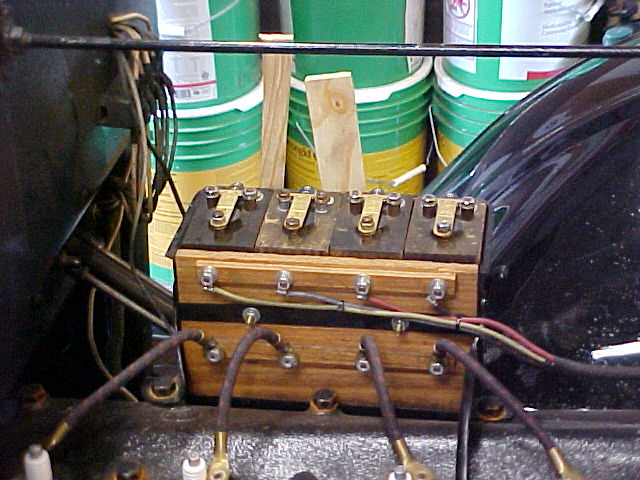
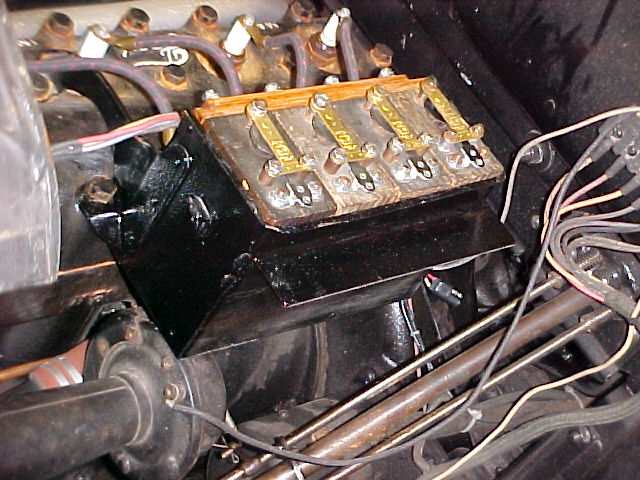
 Our recent experience on the road indicates that we need one coil for every 200 miles of trip. By the way, our trip had three failed coils. Later, I found that one coil had a failed capacitor, another had an open circuit where the bottom button wire detached and the third is a mystery. The mystery, I think, has been solved. I had the idea that my coil box, which is on the engine (1926) was bulging at the center. My car originally did not have a coil box, but a distributor. The distributor was removed and a ebay coil box and Anderson timer replaced it. After I put in a few hours of restoration work into the coil box, I found that the spanner bar that holds the center of the box together would not fit with four coils installed. So I left it out, but as the box swelled the middle coils could have pulled away from the box contacts. To test this idea, we put two wooden wedges in the box to hold the coils tight to the contacts. This worked well on our trip to Model T day in Hartford. So I tried again to install the spanned bar, but no soap, way to tight. The second idea, which has worked, was to remove the coil box and weld a 3/4 x 3/4 angle iron section to the back of the box. This stiffened up the box so the coils will always make good contact.