License Plates
Ever want to have License Plates that match the year of your car?
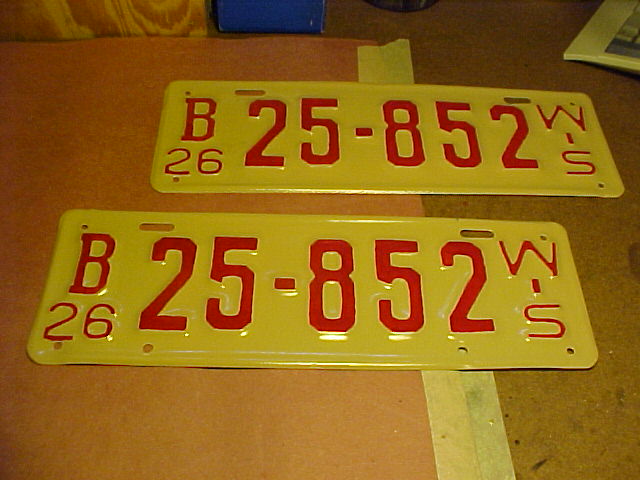
Last summer I picked up a pair of 1926 Wisconsin license plates at the Iola swap meet. You can find most any year and state at Iola. Some people will use the plates as is, while other like to restore the plate. There are plenty of guys on the internet that will restore your plates for a fee and they look great. Or, if you are a cheap skate and enjoy doing things your self you can redo them.
First look for a pair of plates so you have the same number for the front and back. Look for a pair that are in good shape, generally not a problem, unless you are looking for early teens. I purchased my set for $15.00. Once you get them home, you will have to strip off the old finish.
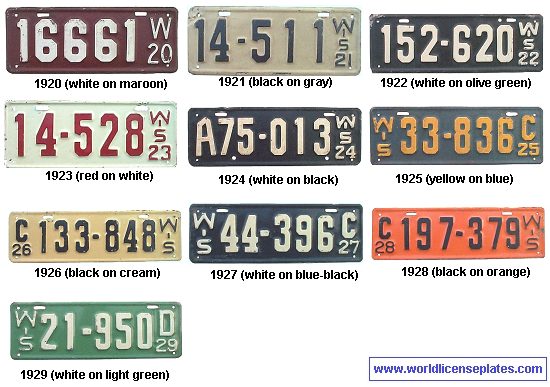
This can be done mechanically, with a wire wheel, chemically with a striper or if you like send them out to a commercial striper. While you are cleaning the old plates, you have to decide what colors you would like to repaint the plates. You can find original plate color schemes on the internet. A good site is WWW.worldlicenseplates.com/usa/us-wixx.html.
Here you can see the 1926 Wisconsin plates are black letters on a cream background. I have decided that red letters on a cream background looks better. This is a personal decision. It doesn't matter if you like purple and green or Packer colors, just purchase good paint. After my plates were cleaned, I used Rustoleum spray paint.
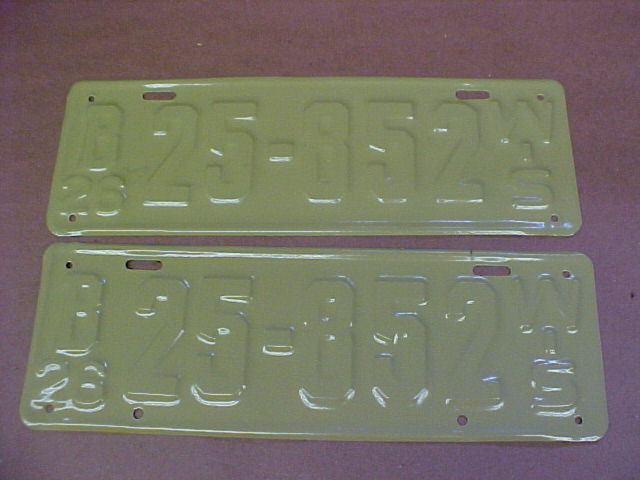
First a primer than the cream color. You can see a couple of small runs, but at a distance they are invisible, besides this is what gives them character and that home made touch. Let the plates dry completely, a few days, so the letter paint will not dissolve the base color. The letter paint is again some Rustoleum oil enamel. Oil paint is easier to control than water based. Also be sure to purchase a pair of good artist brushes. If they don't cost about 3 or 4 dollars a piece, they may work but they will be tougher to use. You can find artist brushes at larger hardware stores, I got mine at ACE Hardware.

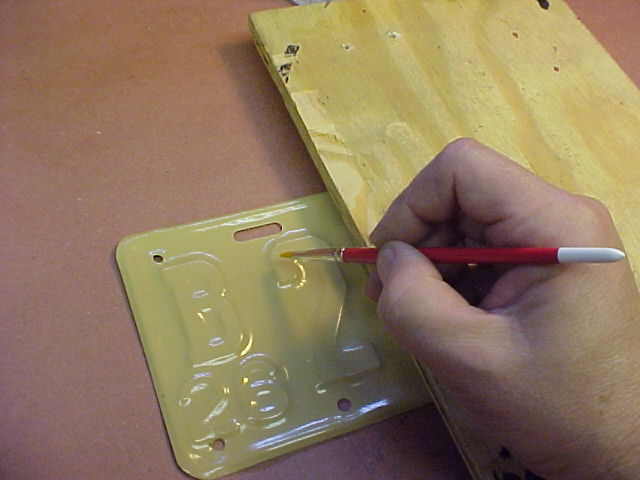
Take your plates to the store to match the width of the brush with the size of the lettering. I purchased two flat brushes, a number 4 and a number 8. The width of the bristles should be a little less than the width of the letters. When you apply paint the brush will spread a little and you will get a nice line, depending on your hand. When you are ready to start painting the letters, a bridge may be helpful.
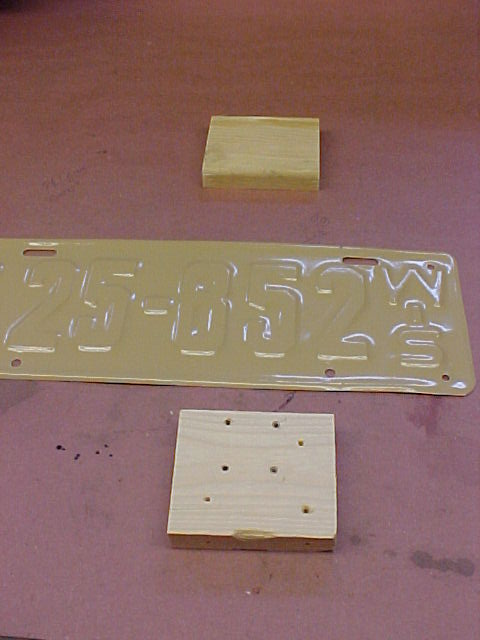
I used two small blocks of wood and a short piece of plywood. This will allow you to place the plate under the bridge and you can rest your hand on the bridge so that the brush is just over the letter. I generally use only a small amount of paint on the brush and have a piece of paper towel to clean the brush frequently. Start the brush stroke from a straight square edge and draw the paint until you approach a change in direction of the letter. After a few draws clean the brush on the paper towel so that paint will not dry on the brush and distort it's shape. Don't worry about a complete color fill on the first coat. If you make a mistake, like drawing out of the line of the letter, use your finger to rub off the mistake. You can then redraw the line.
A second coat will fill in nicely. After the first coat clean the brush with turpentine and then with soap and water. If the brushes are not clean they will not draw well for the second coat. After the lettering is completely dry (24 hours), apply a clear coat over each plate to help protect the plate. Now the only decision to be made is whether or not to display them on the car or keep them in the garage.